Showing posts with label sewing. Show all posts

Wednesday, February 8, 2017

First Grade Class Quilt

Last week, I spent the morning in Dorothy's first grade classroom, doing a quilt project.  It's something I have done every year with my kids classes, but it was the first time for her at her new school.

First, I read The Quilmaker's Gift to the class, which is just a lovely story.  It's about a quiltmaker who gives away her quilts to those in need and a greedy king who tries to force her to make a quilt for him.  Through her kindness and generosity, she thwarts the king's attempts to coerce her into making him a quilt, and she changes his life; turning him into a joyous and generous person.  The teacher told me that the story was a great lead in to a new section they were starting the next day on kindness.  I like that it is a sweet story, with amazing illustrations, and it works as a wonderful way to explain that we will be just like the quilmaker in the story and that we will be donating the quilt that we make together as a class.

After the story, the real fun begins!  Every student gets a grid of fusible interfacing and a baggie of pre-cut fabric squares.  This year, everyone got five each of yellow, green, light blue, dark blue, and a print fabric.  A while back, I bought a remnant lot at a deep discount, but it was sight unseen.  Some of the fabrics I really liked, but there were a couple that weren't really ones I would ever pick.  This was one of those.  I used it as my "inspiration piece" and based the entire quilt off this pretty, but odd, fabric.

I loved the colors, but the bold stripes of the pattern were going to make it difficult to make much with it.  I cut it up into 2" squares and each child got five squares that had a similar pattern on them.  We ended up with floral, stripes, or blue and gold swirls.  In the end, it added some depth and dimension to the quilt, and everything coordinated beautifully, without being 100% matching.  It was a nice change.  Bonus:  it used up almost the entire remnant piece I had.


 They got right to work, placing their fabric squares onto their grids.  I love how it gets really quiet all of a sudden when they all start concentrating.


 So much focus!  There was also a lot of rearranging of their squares in this class.  Some years, the kids go with whatever idea they have first.  Several students in this class started over 2, 3, even 4 times, until they got it "just right."  I purposefully leave the instructions pretty vague, and just say to arrange their squares however they like, and to make sure that every square on their grid is filled; no holes.  Once they are happy with their layout, they use their glue stick to tack all 25 squares down to the grid.  That's a lot of work for a group of 6 and 7 year olds!


 The little boy in blue was in Dorothy's class last year, at her old school, so he had done a version of this project before.


 I loved how serious this little guy was.  He worked so hard to come up with an incredible pattern, and was so incredibly focused.


Once they were done, I collected their quilt blocks to take them home.  At home, I ironed the squares to the interfacing (and straightened them out a bit), sewed the blocks, pieced the top, quilted the top to the backing, and bound the edges.  I try to get it done in about a week, so that not too much time has passed between them making the blocks and seeing the finished product.  I told them I would be back to show them the finished quilt, but warned them that it would not be the very next day, and some of the kids were very disappointed.


 The finished quilt and my fuzzy helper.  He just sat there when I was trying to take a picture of the quilt.  I could not have posed him like that if I tried.

I'll be taking the quilt in to school tomorrow morning, then hanging it in the hall with a bulletin board display so the entire school can view it for a bit.  When I showed it to Dorothy, she gasped, so I'm expecting a good reaction from the kids tomorrow.  That's always my favorite part.  I don't think they can visualize how the work that they do will combine with everyone else's, and how it looks when they are all put together.

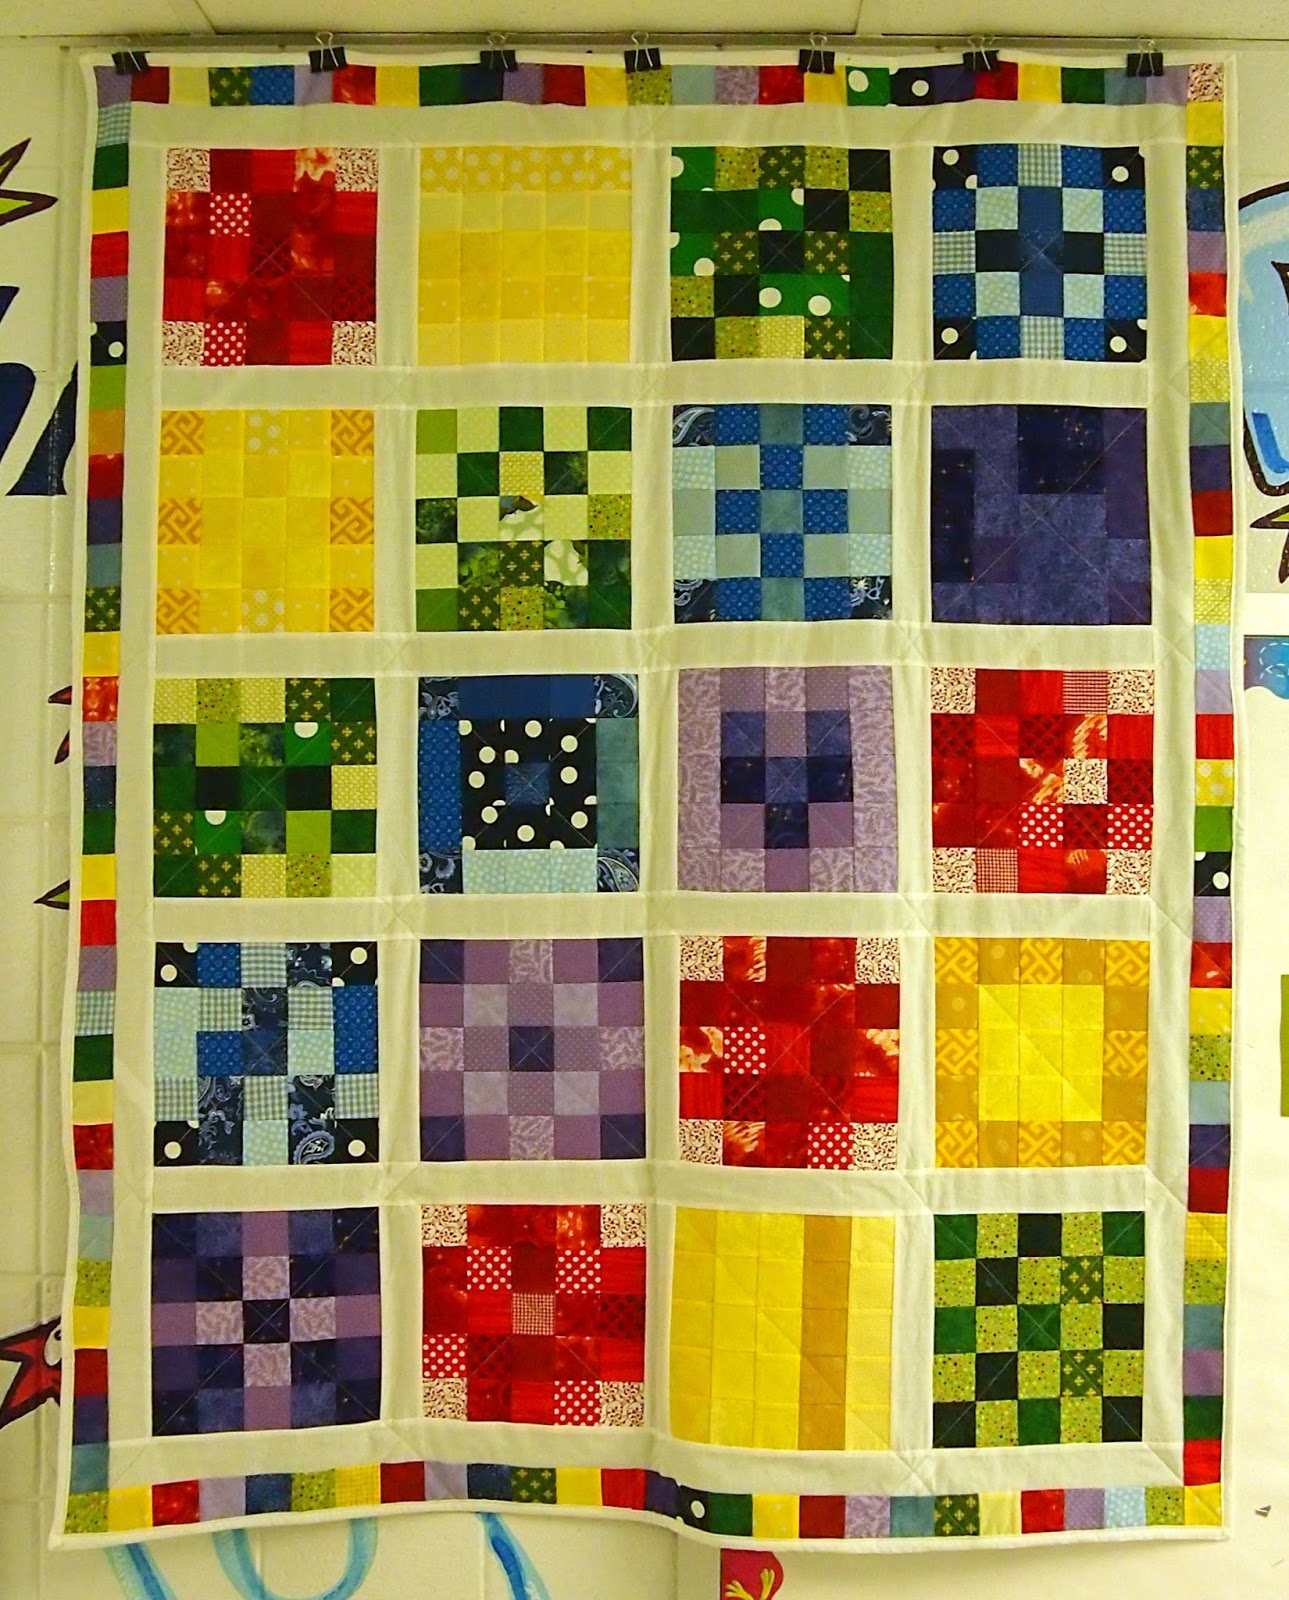
I debated about not using black for the sashing, but I'm so glad that I did.  I was afraid it would be too dark, but I think the effect is like stained glass.  It helps that three of the colors are very light/bright, and really stand out against the dark sashing.

I thought I would like the binding more than I do.  It's not bad, but it doesn't stand out like I was hoping.  I had some of the print fabric left, but not quite enough to do all the binding, so I combined it with a few short pieces left over of the black sashing fabric.  I wish I had enough of either one of the fabrics, instead of alternating them.  Oh well, the kids won't care.

I forgot to take a photo of the back, but I used a piece of aqua minky dot, that is very soft and pet-able.  I happened to have the piece minky and it was exactly the size I needed for the backing.  I love that I was able to do this quilt 100% with fabrics I already had.  The squares, other than the print, were all left from other projects, and the yellow is now all gone.  Perfect! 

After the quilt hangs in the school hallway, I'll bring it home, wash it, then donate it to the local chapter of Project Linus.  


 Just because he never poses so nicely when I'm trying to take his picture.  Right after this, he ran at me and tried to put his nose on the camera lens, which is what typically happens during picture time.

I had a great time with the first graders.  I'm currently talking with my son's forth grade teacher about doing a much larger version of this project, involving the entire forth grade.  I have started prepping, but have a lot more squares to cut.  I need a minimum of 2,180, for things to come out exactly even.  I'll probably do an extra 100 or so as a buffer.  Guess I had better get busy.

Friday, May 13, 2016

Third Grade Class Quilt

I recently made a quilt with Malcolm's third grade class, and I think it might be my favorite class quilt yet.


I tried something a little different this year.  First, I read them The Quiltmaker's Gift, by Jeff Brumbeau.  Then, instead of giving everyone the exact same fabric squares to work with, I had five groups, with four students in each group.  Each group was assigned different color.  They got a container with a variety of fabrics in "their" color that they had to sort through to make their blocks.  Each color had various shades and patterns to work with.  They laid out the fabric choices on a piece of grid interfacing.  Once they were happy with their layout, they used a glue stick to tack down the fabric pieces.


Luckily, It was hat day at school, so in nearly every photo, their faces are covered.


 Some of the kids did random placements, and some had very elaborate designs.


 The purple group had some fabric with glitter on it which was extremely popular.  There were some big negotiations going on to decide who could have the glitter pieces.


 Many students did one layout, then completely removed the fabric squares and started over again.


 Here, she is making rows, but her finished block was very different.


Third grade was a good age to try this with.  They are old enough to be able to follow the instructions easily, and this gave them a little more freedom of choice with their blocks.  I love what the kids came up with and they all look great together.  If I do a quilt with Dorothy's first grade class next year, I think I will stick with giving each child the exact fabric squares they will need.

I took everything home to sew it together, then brought back the finished quilt for them to see.  Showing the completed quilt is easily my favorite part because of all the gasps and, "Whoa"s and the excitement of the kids.  I always hear them pointing out which block they made, and they are very proud of their work.

This class had lots of interesting question for me like, how I made the border of little colored squares, and how I decided which block to put where.  It was a good opportunity to explain the construction process and to let them know how much math I used to figure things out before even coming to their classroom.

After showing them the quilt, I hung it up in the hallway of the school and made a small bulletin board display with the photos I took, the book jacket, a couple of small write ups about how it was made and where the quilt will go, and some extra fabric squares.  I wish I had taken more photos to fill up the bulletin board.  Maybe next time.  It will be donated to Project Linus once it is no longer hanging at the school.

 Here's the quilt and bulletin board at school.  I forgot to take photos of the quilt at home, so I did all my pictures once this was done. 


 Slightly closer look, without all the extra stuff around the edges.


 Slightly closer look at the blocks the kids made.  The depth and texture just doesn't come across in photos.  It is quite stunning, in person.


The third row is sewn straight, it's just laying funny because of the edge of the bulletin board behind it.

These projects are always a lot of work, and partway through I wonder why I'm doing it.  The kids are so enthusiastic when I come back though, and that's why I do it.  I'm always pleasantly surprised how much they like doing these.


Wednesday, February 3, 2016

Dinosaur Quilt for Project Linus

It took a couple of years of trial and error, but I think I have finally worked out the kinks of the sewing project I do with my daughter's 3-6 year old classroom.  This year went so smoothly!  Many of the kids knew what to do already, and I picked a great design package that was cute, colorful, and stitched out quickly.  The kids each got to make an appliqued dinosaur with my embroidery machine and a nine patch square by gluing pre-cut fabric squares onto grid interfacing.  I then took everything home, and sewed it all together into a quilt that will be donated to Project Linus.

Here is our finished quilt:


 The photo doesn't do the colors justice;  it is deep, rich blues, greens, and bright yellow.  Every single dinosaur is unique, and they are all adorable. 


 The back of the quilt is a soft, fuzzy, baby blue.  My eight year old was with me when I went to buy the backing and he made the final choice.  I think he made the right call.  I think the darker green I was also looking at would have made the whole thing too dark.


 I took the quilt in today to show the kids.  They all get so excited to find the dinosaur they made on the finished quilt.


 Unfortunately, we are missing a few kids, but here are most of the little hands that worked so hard on the beautiful project.  The quilt colors look much better in this picture.


First, they picked out which dinosaur they wanted to make, and three colors of thread.


 Changing their thread color:


 There is a lot of thread inside the machine and they have to pull a long way to get it all out.


 I showed them how to thread the machine the first time, then they could try it themselves.  A few of the kindergartners remembered from previous years, and didn't want me to show them. 


Once threaded, the machine does all the work.  They just had to push the "start" button.


Before sewing the dinosaur down, they need to add some glue:


Then, they place the dinosaur on the fabric:


In between threading the machine and pushing the button, there was time to watch the machine stitch out their design:


Sometimes, there is enough time to talk, tell secrets, and visit with friends:
 I love how into it the boys get.


This little one talked my ear off.


Once their dinosaurs were finished, they made a nine patch square:


I discovered that it was easier if I put a little glue inside each square and just had them place their fabric on top.  Adding the glue themselves was a bit challenging for some kids, and others glued it so securely that I had a hard time repositioning things when I got it home.


Lastly, here are some close ups of the dinosaurs the kids made:
 I love the polka dot binding!  My son wanted a solid yellow that I had, but I liked the polka dots better.  I wish the color in these photos was more true to life.


This was really fun project!  I'll be a little sad to say good-bye to this quilt when I drop it off, but hopefully it will make someone's day a little brighter.