Thursday, March 14, 2013

Project Linus Quilt

I have had two separate creative ideas floating around in my head for a while.  First, I have been wanting to make a blanket to donate to Project Linus for a long while now.  I just always put off making a blanket to donate because there were other projects and deadlines and things that seemed more important.  Second, I thought it would be fun to do some sort of sewing or machine embroidery project with the children at my kids' school.  Anything I could think of though, was either going to be much too complicated to carry out with a group of 3-6 year olds, or they were not going to have a completed project to take home.  These two things swirled around in my head long enough that I finally realized that each child could make a square, then I could put them together into a quilt that could be donated.  Perfect!

It still turned out to take longer and be more work than I originally thought (when doesn't it?), but the end results were worth it.  I could never have made something so perfect without the kids.  They chose some color combinations that I really wanted to question, but it looks great all together and is so bright and happy.  If I had tackled this without their help, the clown-fish would all be orange with white stripes, and the pelicans would all be grey and white and brown, with no reds or yellows or purples that make them so fun.

This will likely be my longest entry yet, with tons and tons of pictures, but lets start with the finished product, then I'll go back to the beginning and show how it was put together. 

Here is the finished quilt with (almost) all the little hands that made it. 

Each child appliqued a sea creature onto a piece of muslin.  They picked which animal they wanted make and what colors they wanted to use.  Since there were eight different animals, and three of each creature, I decided to only offer three choices of animal at a time.  I was afraid that with eight options, some kids might be overwhelmed and take forever to decide.  I cut all the animal shapes ahead of time and put them into little envelopes.  Once all three clown-fish were gone, I would add a different animal envelope for the kids to pick from.  I was surprised at how popular the pelicans were.  I think they were the first to go.  I love the turtles, but I guess they didn't really speak to the kids.  They were one of the first three I offered, and they were still there until the very last child got a turn.  *shrug*  Also surprising is how popular the sharks and alligators were with the girls.  I would have guessed that they would like the octopus, but those were all done by boys.

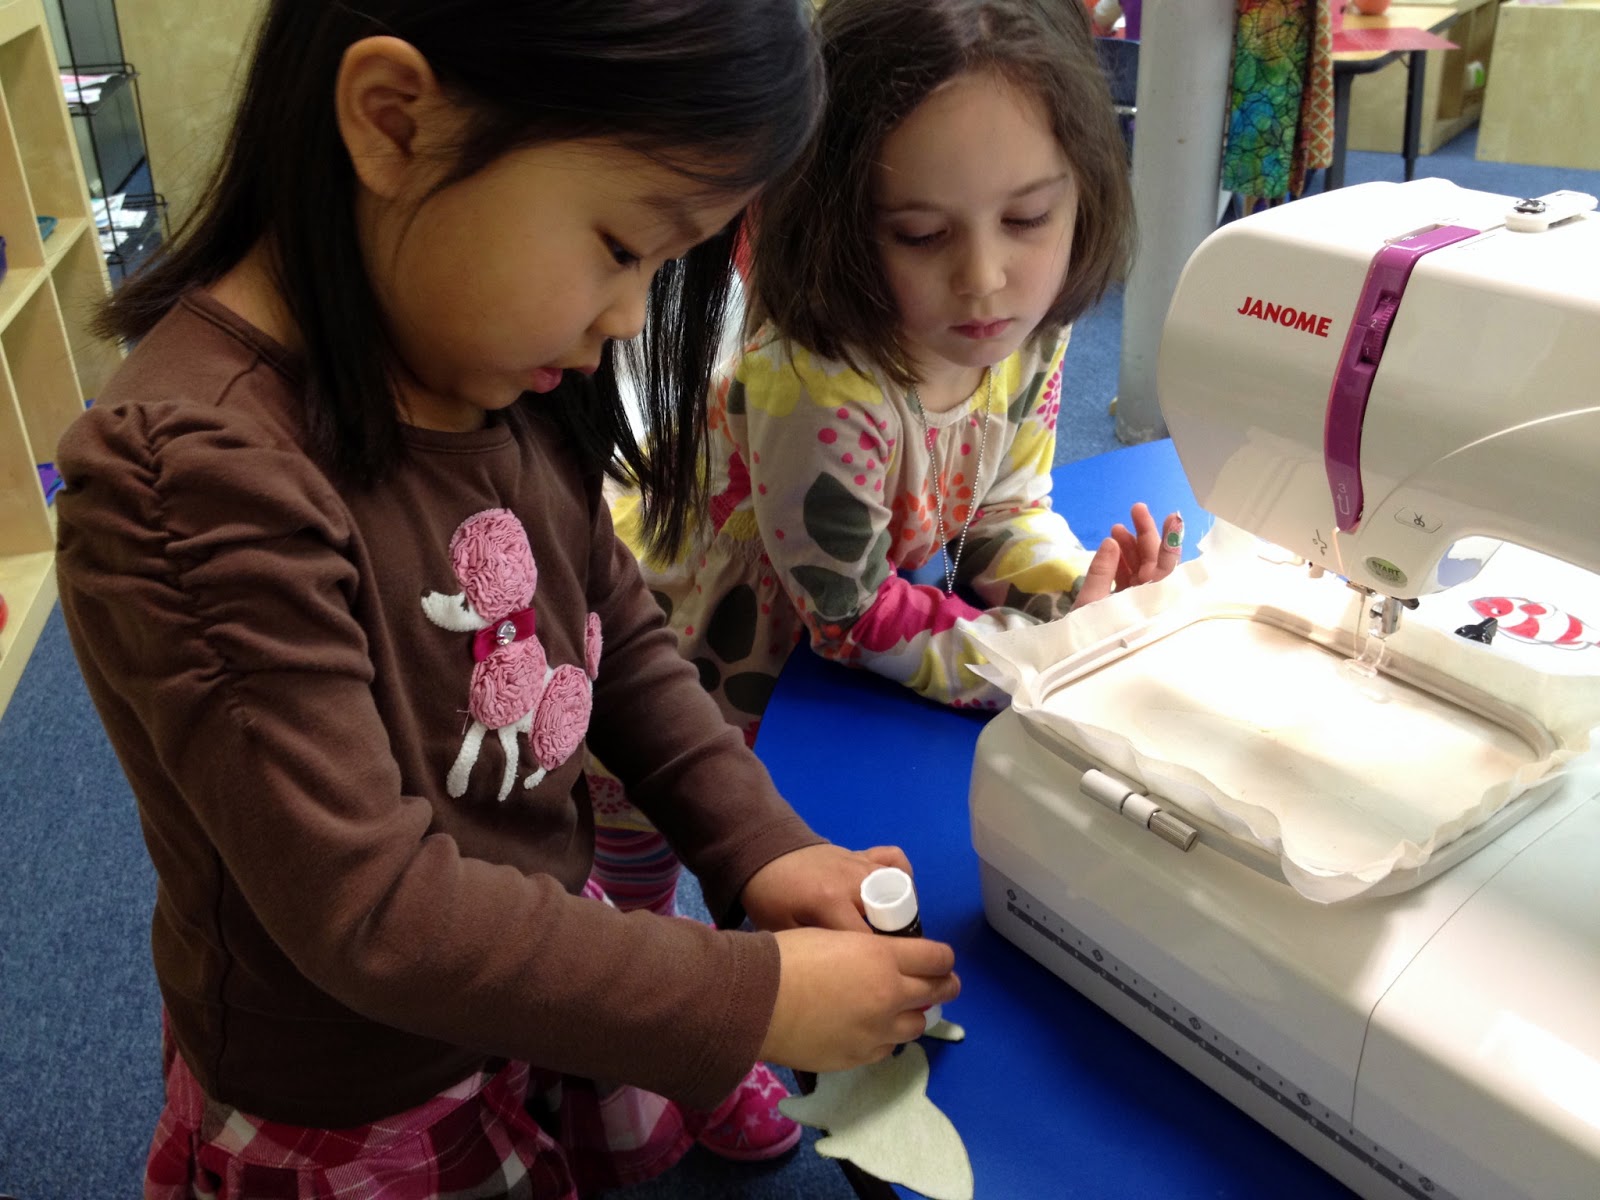
Once they had their animal selected, the kids placed some interfacing and muslin in the hoop.  I tightened the hoop for them while they picked out what color thread they wanted to use.  There were several times where I asked if they were sure about the colors they wanted (no one ever changed their minds), but I didn't offer any suggestions about what I thought was "right."  Boy, am I glad I didn't.  I love some of the crazy color combinations and was so pleasantly surprised at how great they looked when finished.  They looked even better when all of the squares were put together.  Sometimes, it really is best to just keep your thoughts to yourself, and let the kids do their thing.

Once everything was all picked out, I showed them how to thread the machine.  I did it for them the first time, so they could see what I meant when I would say things like, "Now make it go around that shiny bit."  The embroidery machine has a touch screen, like a smart phone, so the kids were pretty good about being able to find the picture of their animal and pushing the button to get the machine ready to start sewing.  A lot of the work is done automatically by the machine, but there is a nice, big, green button that starts it that is lots of fun to push.


There is also a black lever that lowers the presser foot that makes a satisfying "thunk" sound when it is flipped down.  The kids all liked lowering the presser foot, even if they sometimes had a hard time finding the lever towards the back of the machine.
You can see how far he had to reach in to get to the lever.  Some kids would get up, and go around to the back to reach it, others would crane their necks down to see way back to where it was.

The first thing the machine does it to stitch out an outline of their animal.  Then the kids would use a fabric glue stick to put glue on the back of the animal shape, then place the fabric shape in the outline.

 Even the very littlest kids could do the gluing portion.  I think some of them were surprised that they would need to glue the fabric, just like they usually do with paper.


Some of the younger kids needed a little help to make sure their animals were all the way in the outline, but most got it almost perfect.  See how hard the two boys are concentrating in the last photo?  The kids all were very eager to get it just right.

Once they had their animal glued in place, it was time to push the big green button again.  This time, the machine did a quick zig zag stitch all of the way around the outside of the fabric shape, to tack it down and keep it from shifting while being embroidered.

When it was time to change thread colors, the kids would take the old spool off of the machine and put the new one on.


Most of the kids wanted to try and thread the machine themselves, but a couple (mostly the three year olds) wanted me to do it for them.  Those who gave it a try did really well; I just had to hold the thread at the top to keep them from unwinding the entire spool of thread as they pulled, and pulled, and pulled.  A couple of the older kids got very good at threading the machine and came and helped some others later.


While the machine was stitching out the designs, there was sometimes a bit of a wait.  It is really fascinating to watch the machine working though.  You may have noticed in many of the pictures, there are other children gathered around watching what the one who is working is doing.  Even after I had been coming to class for a couple of weeks, there were still kids wandering over to check out what was happening.  The first two days were very exciting and the poor teachers had to keep redirecting kids who desperately wanted a turn and were constantly hovering.


While waiting for the machine to stitch out the designs, the kids and I would talk about what kinds of stitches it was doing, watch the counter that told them how many stitches they had done, and check the timer to see how many minutes were left.  They also liked just watching it.  I admit, it is pretty hypnotic.


Sometimes, they got a little silly.


The kids were all so proud of their work, and often came over to the table to admire all the squares that were completed.  Many posed for me with their finished squares.  I forgot my camera a couple of days, so I wasn't able to get everyone.


The little boy in the last picture asked that I take a picture of the back of his seahorse, so I did.


Getting all of the squares sewn took a bit longer than I had originally planned.  I forgot to factor in the extra time to let the children pick out their designs, push the buttons, and thread the machine.  I do them without even thinking most of the time, and do them in ways to save time.  With the kids, we had to do just one thing at a time, so it took a long time for everyone to get a turn.  It was a little disappointing the first day, when we had only finished three squares.


After a couple more days, we were half way there.


Finally, all of the squares were done!
It took even longer since I missed a couple of days.  I was going only on the three days a week my daughter goes to school.  Then, one day was a school holiday, another, my daughter woke up sick at 5:00am and couldn't go to school, and another I had a dentist appointment that I had already rescheduled once.  Eventually, every child had a turn, and the staff also got to do one. 

Once the applique squares were completed, I combined them with some little nine block patchwork blocks to make the quilt.  I used all scrap fabric leftover from other projects for the nine square blocks, so it didn't cost me any extra for the quilt top.  I did have to buy a little light blue fabric for the boarder, but already had the darker blue corner squares and the fabric for the binding.  Here it is all pieced together, and ready to be quilted.
I guess it technically isn't a quilt, since it does not have any batting sandwiched between the layers.  The backing is a super soft, ultra cuddle fabric that I bought on sale, with an additional % off coupon.  It is super soft and a bit fluffy, so I didn't add any extra batting, because I was afraid it would get too heavy.  I also didn't want to quilt over the applique work and the batting might not hold up to washing. 

Each nine patch block has a nautilus shell quilted on it.  They blend in and barely show on the front, but it makes a pretty and interesting design on the back.


This was a very fun project, even if it was a bigger time commitment than I had planned on.  I don't know yet if I will want to do another one next year (or if the teachers will want me taking over a back table for a couple of weeks again), but I am very glad we did it this year.  The kids were very excited when I brought the finished quilt in for them to see.

I hope that the child who receives it enjoys it and that it brings them some comfort.


Thursday, February 14, 2013

Valentine's Day Crafting Extravigana!

So, it's Valentine's Day, and I'm exhausted.  You know how sometimes you have a "simple" idea that sounds so awesome in theory, then it turns out to be not as simple as previously thought?  Yeah, well that happens to me all the time, and this past week was no exception.

I have an adorable design for Valentine's Day lollypop holders in the shape of Conversation Hearts.  It seemed like such a simple plan.  I already had the design, and it would use up scraps of ribbon and fabric, so would cost me nothing to make.  Great, right?  Even better, when I made a couple of test hearts, I found that they would be a fantastic way for me to use up some really crappy embroidery thread.  The thread worked great in the bobbins, and I needed colored bobbins so that the back would look as finished as the front.  The only catch was that I would have to babysit the machine, because the thread twists, knots, and tangles so badly that it won't go through the machine without me manually holding it as it comes off of the spool.  It is time consuming, but very easy to do, so I thought it was no big deal...until after I had been doing it for hours on end.  I had somehow forgotten to take into account that since my daughter has also started school, and they are in the same class, that she would also be needing Valentine's this year, so instead of around 20 hearts, I needed to make 40 (44, to be exact).  Also, I did not start on hers until Tuesday, so I did all 22 of hers, plus the last couple for my son, in just two days.  Never again.  By the end, I had given up on my "using up the crappy thread" plan, and was using my good stuff (so I could leave the machine unattended), with the crappy kind in the bobbin, and just hoped that they matched close enough that no one would notice.

On the other hand, they did turn out really cute.

Dorothy's hearts.  The kids "wrote" little notes that I folded up and slipped through the button holes.  The school has a no sugar policy, so we couldn't send lollypops.  I thought about doing pencils or something else, but decided the notes were good enough.  The kids used stamps and markers to decorate the paper.  I wrote Dorothy's name on hers.


There are ribbons sewn into the top, so they can be used as ornaments or decorations of  some type later.


I tried to make some of Malcolm's more "boyish," but I'm not sure that it matters at all at this age.


They also needed some sort of box to collect their Valentine's in.  I saw this cute suitcase idea online, and stole it.  I used cereal boxes, specifically, Cracklin' Oatmeal boxes.  They were a good size that the kids could handle, but still wide enough to accommodate cards. 
Both boxes together, and full of Valentine's from their friends.  The hardest part was the construction paper hearts I wrote their names on.  I had to redo them three times because I made them too big to fit on the boxes.  The paper is just Christmas wrapping paper that is red and white and the ribbons were left over from when I made Dorothy a bow holder.  The handles were easily my favorite part.  The kids could carry them easily as we walked to and from school.  In the past, the boxes were awkward and difficult to handle.


Just Malcolm's box, a little worse for wear.  It got splashed with a little slush on the way home, and the opening got ripped a little getting cards in and out.


Dorothy's box also had a little trouble before we got to school.  She slipped on some ice and a corner got dented and some tape came undone.  She was fine, but she was worried about her box.  It was fine too.  I wiped off the slush, and pressed the tape back down, and it was all better.


Valentine's Day also happened to be our assigned snack day.  I wanted to something themed, but couldn't send any of the cute ideas I saw that included sugar.  I saw something similar online, but the centers of the apples were not filled with anything.  Dorothy wanted to take apples, so I sliced them into thick-ish rings and used the same cookie cutter to cut out cheese to put in the centers.  Many thanks to the very nice lady at the deli counter who sliced the cheese for me and didn't think I was a crazy person with my odd requests. 
How cute are these?  Both of my kids denied having any snack today though.  Malcolm assured me that lots of other kids had snack though.  OK, but why do you not eat it when it is something I make and that you request? 

Now, I am very tired and am going to nap for the next few days.